


That dreaded drip from your ceiling — we've all been there. Whether it's during a fierce Illinois thunderstorm or after days of spring rain, a leaking roof can quickly turn from a minor annoyance into a homeowner's nightmare.
As roofing experts serving Illinois for over 30 years, the Greater Midwest Exteriors team has seen every type of roof leak imaginable. While the urge to immediately climb up and fix it yourself is tempting, understanding the right approach can save you time, money, and potentially dangerous mistakes. Let's explore your options for handling that leak, from emergency fixes to long-term solutions.
Understanding Roof Leaks: Signs and Common Causes

Illinois's dramatic weather swings, from freezing winters to stormy springs, create unique challenges for residential roofs. These extreme conditions can turn minor roofing issues into significant problems, making early detection crucial for protecting your home. To avoid costly repairs and extensive water damage, we’re here to help you understand the warning signs of a leaking roof.
Early Warning Signs of a Leaky Roof
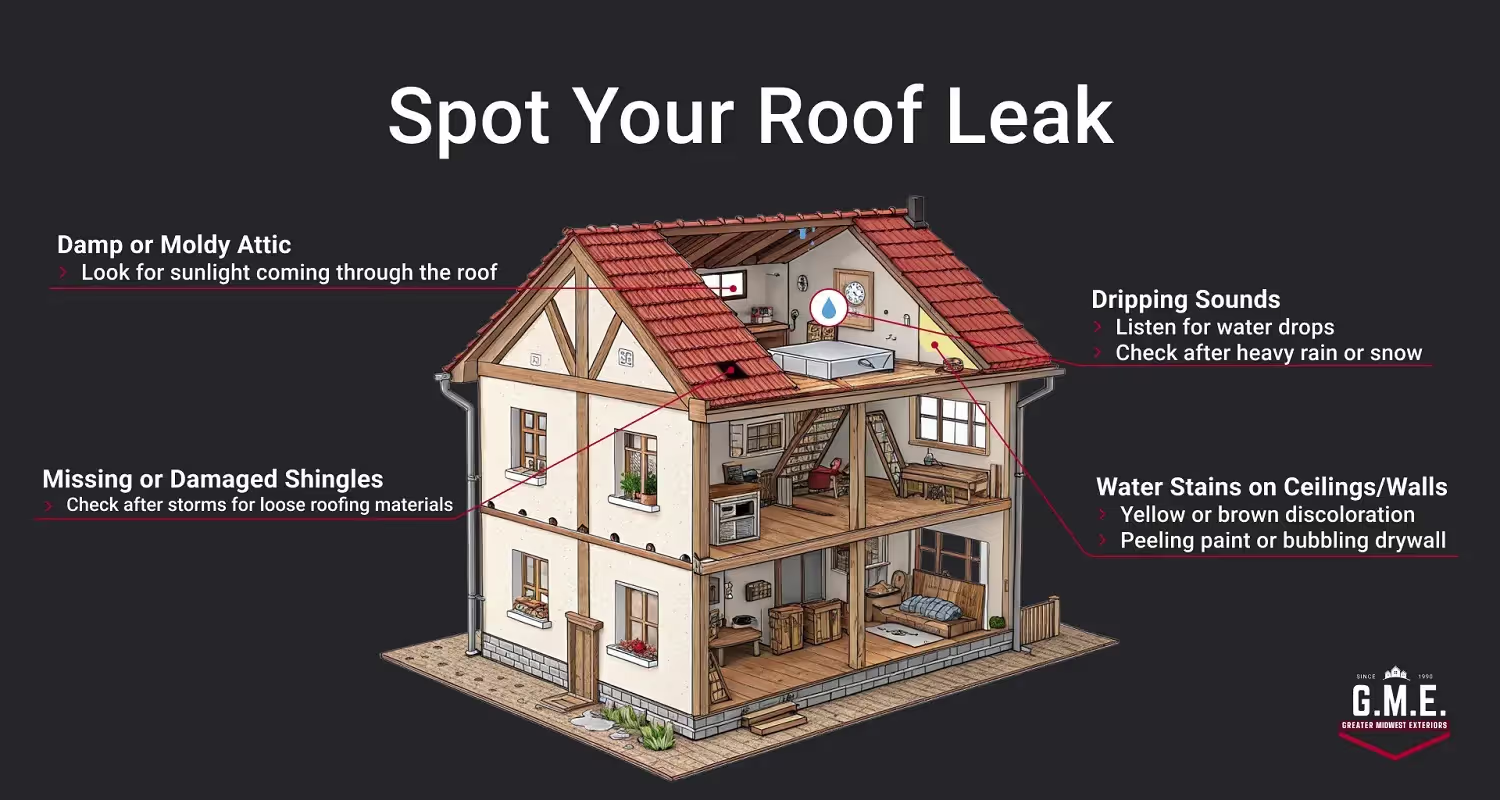
Before water drips from your ceiling, your home often shows subtle signs of roofing problems. Water typically travels along roof rafters and sheathing before finding its way into your living space. This means the visible leak location may be far from the actual roof damage. Here are the key indicators and red flags to watch for:
- Water stains on ceilings: Yellowish-brown rings or dark spots on your ceiling or walls, often growing larger during rainfall.
- Musty odors: Strong, damp smells in your attic or upper floors that indicate potential mold or mildew growth from hidden moisture.
- Peeling paint or wallpaper: Bubbling or peeling on walls and ceilings, caused by moisture seeping through the roofing material.
- Dripping sounds: If you hear water drops in your attic or walls after rain, don’t ignore it! That sound might be a leak — check your attic before it worsens.
- Missing or damaged shingles: Visible gaps in your roof's surface or curled, cracked shingles that compromise your roof's watertight seal.
Major Causes of Roof Leaks in Illinois
Our region's distinct weather patterns create specific vulnerabilities in residential roofs. Understanding these common causes helps you identify and address problems before they escalate:
- Ice dam formation: Winter's freeze-thaw cycles create ice build-ups that force water under shingles, resulting in damaged roof decking and interior leaks.
- Storm damage: High winds and hail can lift shingles and create exposed areas where water penetrates the roof structure.
- Aging roofing materials: Deteriorating asphalt shingles and compromised flashing around vents and chimneys create entry points for water.
- Faulty installation: Improperly installed roof components or missing step flashing can lead to chronic leaks that worsen over time.
- Clogged drainage systems: Backed-up gutters force water under shingles and create standing water that compromises roofing materials.
If you've neglected regular roof maintenance, these issues can develop silently until water starts appearing inside your home. It’s essential to address the root cause of a leak, rather than just treating visible symptoms, to avoid further damage to your home's structure.
Safety First: Essential Precautions
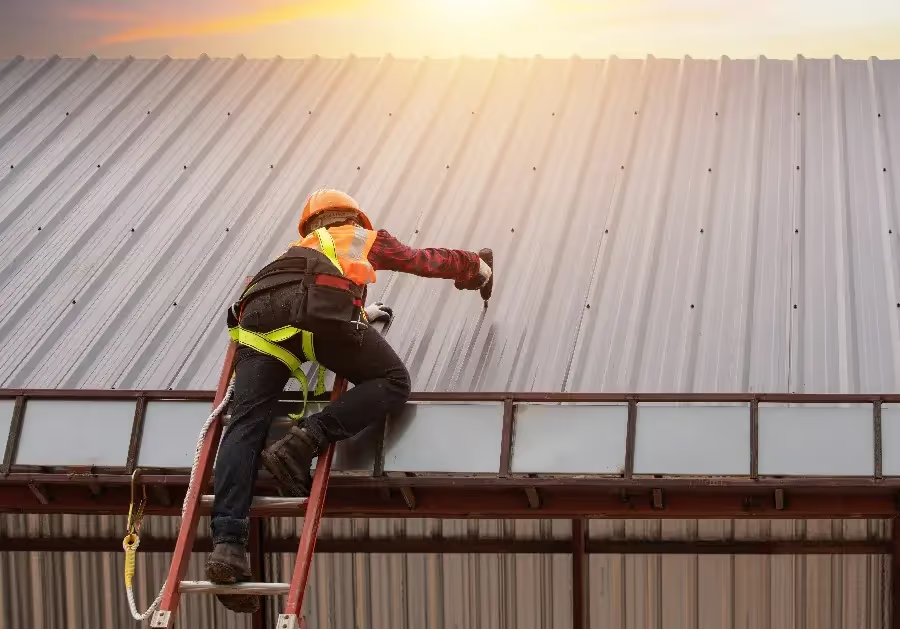
Attempting DIY roof repairs can be dangerous, especially if you lack experience with roofing work. While the urge to fix a leak immediately is understandable, your safety should always come first. Even experienced homeowners can face serious risks when working on a damaged roof.
High-Risk Weather Conditions
Weather plays a crucial role in roof repair safety. Even minor repairs become dangerous when conditions aren't ideal. Here's when to stay off your roof:
Wet or Damp Conditions
Water transforms your roof into a treacherous surface. Even morning dew can make shingles as slippery as ice, creating perfect conditions for dangerous falls.
High Wind Situations
Winds over 20 mph can throw you off balance in a matter of seconds, especially when you’re carrying repair materials. Strong gusts also make ladder work extremely dangerous, even for experienced roofers.
Lightning and Storms
Metal tools and roofing materials become lightning rods during storms. Even distant thunderstorms can quickly move in and create life-threatening situations on an exposed roof.
Extreme Temperatures
Heat exhaustion can strike quickly on a sunbaked roof. Similarly, cold temperatures make materials brittle and decrease manual dexterity, increasing the risk of accidents.
Critical Safety Equipment Requirements
Understanding proper safety gear is essential before you attempt any roof work. Even minor repairs require full safety preparation. Keep the following in mind.
Fall Protection Systems
A properly rated safety harness and anchor points are non-negotiable. Your system should allow you to move while you work but prevent you from falling from any roof edge.
Proper Ladder Setup
Your ladder must extend three feet above the roof edge and be secured at both the top and bottom. Always maintain three points of contact when climbing.
If you’re even slightly hesitant about your skills, please don't try fixing the roof yourself, even if there is someone with you helping! Your safety is worth more than any potential savings from DIY repairs. Professional roofers like ours have the training, equipment, and experience to handle repairs safely and effectively.
Finding the Source: Leak Detection Guide
Finding a roof leak requires methodical investigation and attention to detail. Water can travel significant distances from its entry point, making precise detection crucial for effective repairs. A systematic approach helps ensure you find the true source of the problem rather than just its symptoms.
Essential Leak Detection Tools
Before starting your inspection, gather:
- Bright flashlight: High-powered LED light for examining dark corners.
- Probing tool: Flathead screwdriver or putty knife for checking suspicious areas.
- Garden hose: For controlled water testing of potential leak areas.
- Marking tools: Chalk or painter's tape for marking problem spots.
Interior Inspection Process
Always work with a partner when conducting leak investigations. While one person examines the attic, the other can help spot water entry points or provide assistance if needed.
Step 1: Prepare Your Workspace
Enter your attic during daylight hours with a powerful flashlight. Give your eyes time to adjust and ensure you have your footing on the support beams.
Step 2: Start at the Water Marks
Begin your inspection where you've noticed water stains on your ceiling below. Mark these spots with painter's tape so you can reference them easily.
Step 3: Trace the Water Path
Follow any visible water trails upward — water typically travels down and across before dripping. Look for dark stains on rafters and sheathing.
Step 4: Check Potential Entry Points
Examine areas around chimneys, vents, and pipes. These junction points are common sources of leaks.
Step 5: Look for Light
Turn off your flashlight periodically and look for daylight peeking through the roof — these spots indicate potential holes.
Exterior Inspection Steps

Work systematically around your roof in sections. Choose a clear day with good visibility for your inspection, and then follow the below steps.
Step 1: Ground Assessment
Walk the perimeter of your house first. Look for obvious signs of damage and fallen shingle granules around downspouts.
Step 2: Ladder Position
Place your ladder on solid, level ground and secure it properly. Work in small sections instead of moving the ladder frequently.
Step 3: Shingle Examination
Scan each section for curled, cracked, or missing shingles. Note any areas where granules are missing or shingles feel loose.
Step 4: Check the Valleys
Examine roof valleys carefully — these crucial areas direct water flow and are common leak sources.
Step 5: Inspect All Flashings
Check metal flashings around chimneys, vents, and dormers. Look for rust, gaps, or loose sections.
Common Leak Detection Mistakes
While checking for leaks might seem like an easy task, our team highly suggests keeping in mind the following:
- Assuming single entry points: Most leaks have multiple contributing factors.
- Ignoring small details: Even tiny holes in flashing can cause significant leaks.
- Skipping professional assessment: Some leaks require expert diagnosis.
Patience and careful observation go a long way in finding the exact source of a roof leak. While some leaks are obvious, others may require professional inspection tools and expertise to locate accurately. Remember that proper diagnosis is essential for effective repair — treating symptoms without addressing the root cause can lead to recurring problems and more extensive damage in the future.
Emergency Fixes
When water starts dripping through your ceiling during an Illinois thunderstorm, you need to take immediate action to prevent interior damage. While temporary fixes aren't permanent solutions, they can protect your home until professional repairs are possible.
When Emergency Repairs Make Sense
Water entering your home can cause thousands of dollars of damage within hours. Understanding when to attempt emergency repairs — and when to wait for professionals — can save both your home and your safety. In Illinois, unpredictable weather patterns often create situations where temporary fixes are needed before professional help arrives.
Active Storm Leaks
Water actively dripping through your ceiling during a storm requires immediate attention. Place buckets to catch any drips and consider emergency tarping if it’s safe to do so.
Ceiling Water Buildup
Bulging ceilings indicate trapped water, which can collapse without warning. In this scenario, create small drainage holes in bulging areas to release water in a controlled manner.
Multiple Leak Points
Several leaks developing simultaneously often indicate serious roof damage. Be sure to document all leak locations and implement temporary barriers where possible.
Weather-Delayed Professional Help
When storms prevent immediate professional repairs, temporary solutions protect your home until help arrives. In the meantime, focus on interior water management and documenting damage.
Quick-Fix Solutions

Even basic DIY skills can help protect your home during roofing emergencies. These temporary solutions buy time until professional repairs are possible, but remember — they're not permanent fixes.
If you can’t go outside and you have no experience in roof leak fixing, consider the following:
- Bucket brigade method: Place clean containers under active leaks to catch water. Use multiple containers of different sizes to ensure all drips are caught. Mark leak locations with tape for later professional inspection.
- Ceiling water release: For bulging ceilings, place a bucket directly under the bulge and carefully puncture the center with a screwdriver to release trapped water. This prevents the ceiling from collapsing while protecting your floor.
If you can go outside and do some primary emergency fixes (and have DIY experience!), try doing the following:
- Tarp installation: For experienced DIYers, properly installing a roof tarp may offer temporary protection. Secure heavy-duty tarps (minimum 6-mil thickness) over damaged areas, extending past the roof's peak. Never attempt to do this during storms or high winds.
- Roofing cement application: For small, accessible leaks, quality roof cement can provide temporary sealing. Apply only in dry conditions using a putty knife to create a smooth seal around the leak area.
Remember that temporary fixes typically last only 2-4 weeks, at most. Attempting DIY repairs without proper technique can complicate future professional repairs and potentially void your warranty coverage, so you’ll want to approach them carefully.
Long-Term Solutions
Let’s face it: Illinois has a challenging climate, so proper roof repair requires expertise. While some minor repairs might seem DIY-friendly, most long-term solutions need professional implementation for lasting results.
DIY Repair Options
For homeowners with roofing experience, certain repairs can be handled safely. However, it’s important that you understand your limitations to ensure both safety and roof longevity.
Feasible DIY projects:
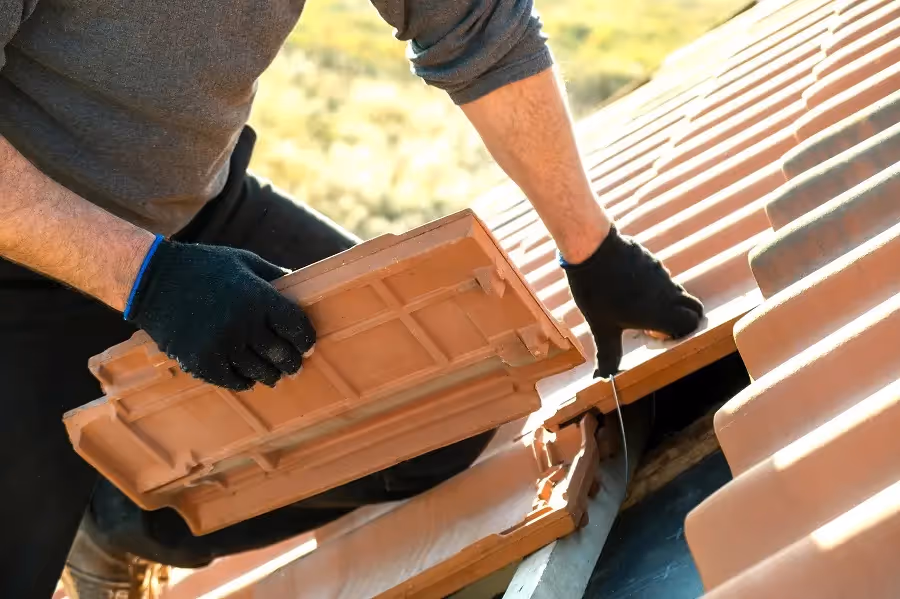
- Single shingle replacement on low-slope areas
- Minor gutter repairs and cleaning
- Simple flashing reattachment
- Small areas of sealant application
Remember that improper repairs often lead to more extensive damage and might void your roof's warranty. When in doubt, always consult professionals.
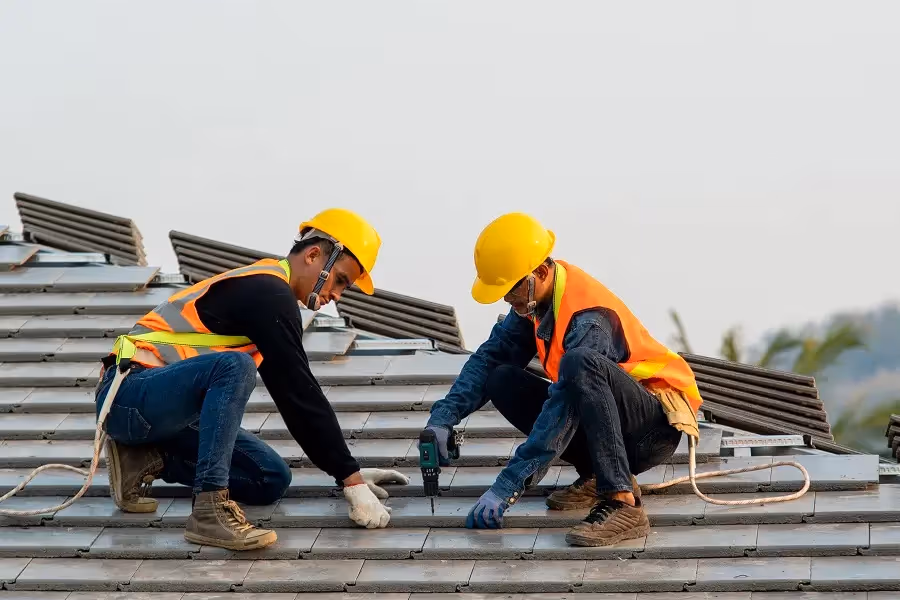
Professional Roofing Solutions
Professional roofers bring expertise, proper equipment, and warranty protection to every repair. Their comprehensive approach ensures lasting solutions rather than quick fixes.
Professional advantages:
- Complete system inspection and damage assessment
- Proper material matching and installation
- Building code compliance
- Manufacturer warranty maintenance
- Prevention of related problems
- Long-term cost savings through quality repairs
Repair Solutions Comparison
Different leak scenarios require different approaches. The Greater Midwest Exteriors team has put together a practical guide to common solutions to help you:
Choosing between temporary and permanent solutions depends on various factors, including budget, urgency, and long-term plans for your property. While emergency fixes are important, only professional repairs provide the lasting protection your home needs.
Insurance and Professional Help: Making the Right Choice
Documenting roof damage properly can mean the difference between a successful insurance claim and out-of-pocket repairs. Start by taking clear, dated photos of all damage, including:
- Interior water damage
- Exterior damage points
- Damaged personal property
- Temporary repairs made
Most homeowner policies cover sudden, accidental roof damage from storms or falling objects. However, damage from gradual deterioration or lack of maintenance typically isn't covered. Even the highest quality roofing materials will eventually need replacement — remember that most roofs last 20-50 years, depending on material and maintenance.
Working with Insurance
Follow these steps for a successful claim:
- Document everything immediately (make photos, videos).
- Make only necessary temporary repairs.
- Save all receipts for materials and services.
- Get professional assessment quickly.
- Submit the claim promptly with complete documentation.
Finding the Right Professional Help
Choosing a roofing contractor shouldn't feel overwhelming. Here's how to find a trustworthy professional who'll protect your home and investment.
Start your contractor search by asking these essential questions:
- Can you show me recent local projects similar to mine?
- What's your approach to unexpected problems during repairs?
- How do you protect my property during repairs?
- What type of warranty coverage do you provide?
Red flags to watch out for:
- Pressure you for immediate decisions
- Offer drastically lower prices than competitors
- Can't provide local references
- Lack of proper insurance documentation
Remember, the best contractors stay busy — if someone can start immediately during peak season, that's often a warning sign you’ll want to avoid. Quality work is worth waiting for. A thorough estimate should include the removal of old materials, substrate repair if needed, and complete cleanup services.
Secure Your Home's Future: Take Action Today
A leaking roof might seem like a daunting problem, but with the right knowledge and approach, you can protect your home from water damage while making informed decisions about repairs. Remember, while some temporary fixes can buy you time, professional assessment ensures your roof continues to protect your home for years to come.
Our experienced roof repair team at Great Midwest Exteriors is ready to help protect your home with lasting, professional roof repairs. We have over 30 years of experience and have worked on over 50,000 roofs. If you're dealing with a leak after storm damage, want to prevent future problems, or need other exterior services, contact us for a free inspection.


